…start using Sweave, from scratch!
INTRODUCTION
Sweave is nothing more, nothing less than one of the best ways R can connect with a text editor, in this case LaTeX.
So you don’t know anyting about LaTeX? neither did I 8 months ago… The hyperlinks in this post will take you to some great pages, to learn different things in an organised way. Here’s how I did it (with lots of help from google though!).
It’s important to take it step by step…
Second, you need to install R, from here. Once you have installed it, you will need to install a LaTeX distribution (my preferred LaTeX editor is TeXworks, and I have MiKTeX in MS Windows).
If you are a MS Windows user, you will find useful this one: MiKTeX.
For Linux users, here can be Kile (from KDE), TeXworks, or other alternatives. First of all you should install LaTeX (e.g. TeX Live), and configure it with these tips.
For Mac users, you can follow this link (valid for other OSes) which provides instructions to install TeXmaker. You will be able to install TeXworks from here.
NOTE: Both, MiKTeX and TeXmaker have portable versions, easy to carry in a pendrive!
What TeX editor did you install? If you have TeXworks, the way to configure Sweave is pretty quick and easy. If you are a beginner, this may be the best option.
MacTeX
CONFIGURING SWEAVE FOR TEXWORKS
If you have TeXworks, all you have to do is go to:
Edit >> Preferences >> Typesetting
You will see this screen:
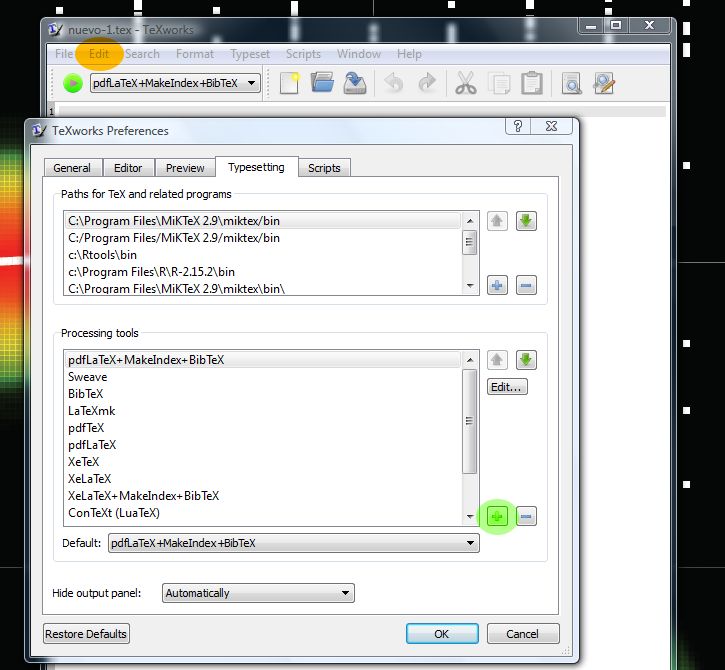
Sweave configuration
If you click the “+” button (highlighted in green) to add a new tool, another screen will appear. Here, the configuration varies slightly depending on the Operating system.
In MS Windows

Sweave in MS-Windows
You only have to fill in these fields with the name of the new tool, Sweave and adding its “arguments” clicking in the “+” sign.
The field Program is filled with the path to your R executable, which can be similar to that in the picture. Just be careful to type “slashes” ( / ) instead of “backslashes” ( \ ).
The field Arguments will contain all the commands that Sweave needs to connect to the R console, to interpret R’s code and to produce a .TEX file and a .PDF.
In (K)Ubuntu & MacOSX
In (K)Ubuntu is configured in a similar way:
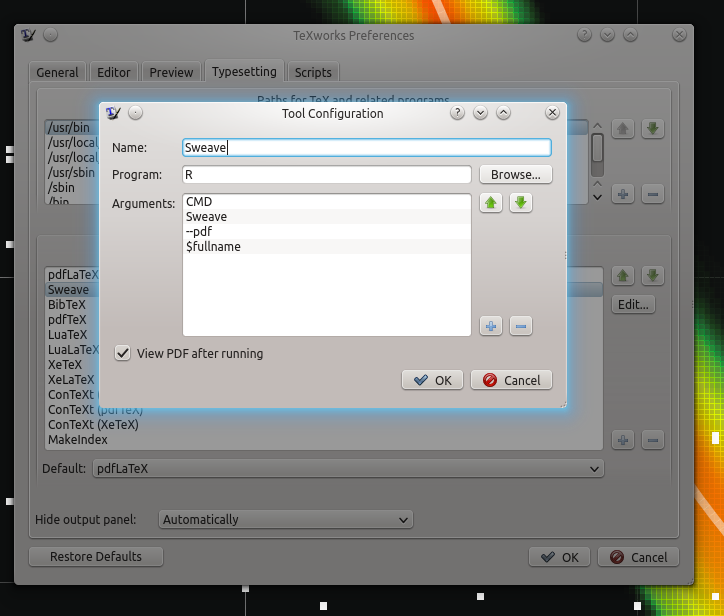
Sweave in Kubuntu
And so in Mac OS X (note that we have the same Sweave commands as in Ubuntu):
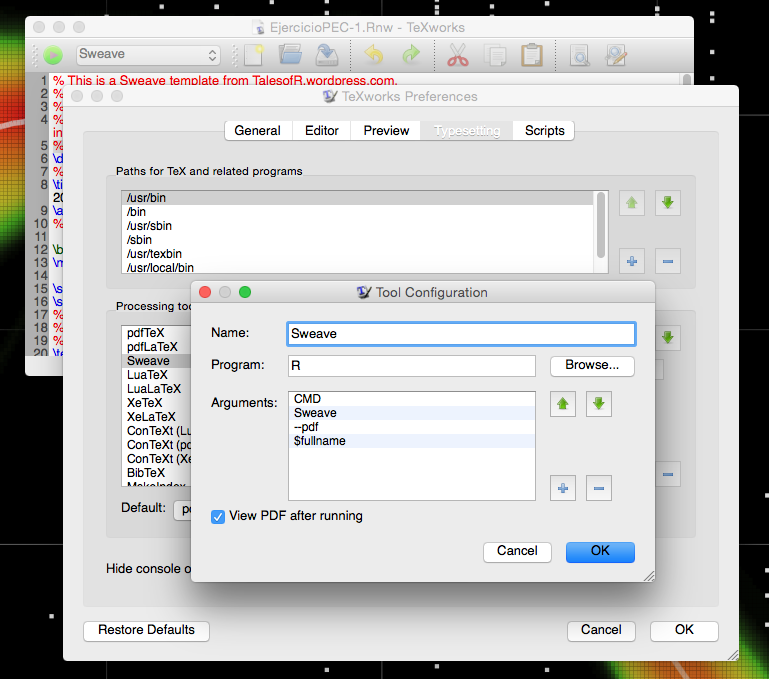
Sweave in MacOSX
WRITING A .RNW FILE
Let’s write something in a new Sweave file!. To this, you must create a new text file (e.g. myfirstsweave.txt) , and change its extension to .Rnw (see this for more help for MSWin users):
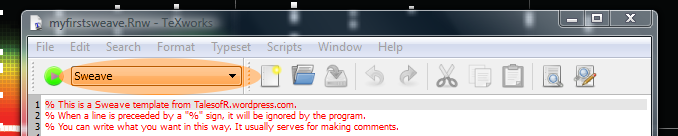
myfirstsweave.Rnw
This is a blank file, but you can paste the following code to construct a template:
Once you have your template, you must… “compile” it. First, you can highlight the code with nice colours clicking:
Format >> Syntax Coloring >> LaTeX
To compile the LaTeX/Sweave file, you have to click in the pull-down menu, and select:
Sweave
Compiling TeX files with Sweave
Great! the last step is to click in the green, round “play” button…
Voilà!

Sweave output
EDIT FOR TEXWORKS IN UBUNTU
The installation of TeXworks in my Kubuntu 12.04 has been direct from the console -at least it worked for me-, without following further instructions:
sudo apt-get update
# sudo apt-get upgrade
sudo apt-get install texworks
After the configuration of Sweave typesetting -see above-, I was trying to compile my own template, and this error appeared:
Error in texi2dvi(file = file, pdf = TRUE, clean = clean, quiet = quiet, :
Running 'texi2dvi' on 'untitled-1.tex' failed.
Messages:
sh: 1: /usr/bin/texi2dvi: not found
Texi2dvi appears to be a script that allows direct compilation of a .pdf from a .Rnw file.
Maybe it’s not the cleanest solution, but I copied the source code of texi2dvi and created a script with it: (sudo gedit if you are running Ubuntu, sudo kate if Kubuntu).
Open up a Terminal and type:
sudo kate /usr/bin/texi2dviThen you can paste the code into this script, and save the changes. To make it executable, type in the Terminal:
sudo chmod 755 /usr/bin/texi2dviFURTHER READINGS
This Sweave manual, updated in 2017 by Friedrich Leisch and the R-core Team.
These Sweave customization tips, written by Ross Ihaka himself.
